Support
Get help with your Pinlights products or reach out to our team.
Evil Dead Pinlights Connections
Installation instructions for connecting Pinlights to an Evil Dead pinball machine.
Power off the game before attempting your installation.
General Illumination
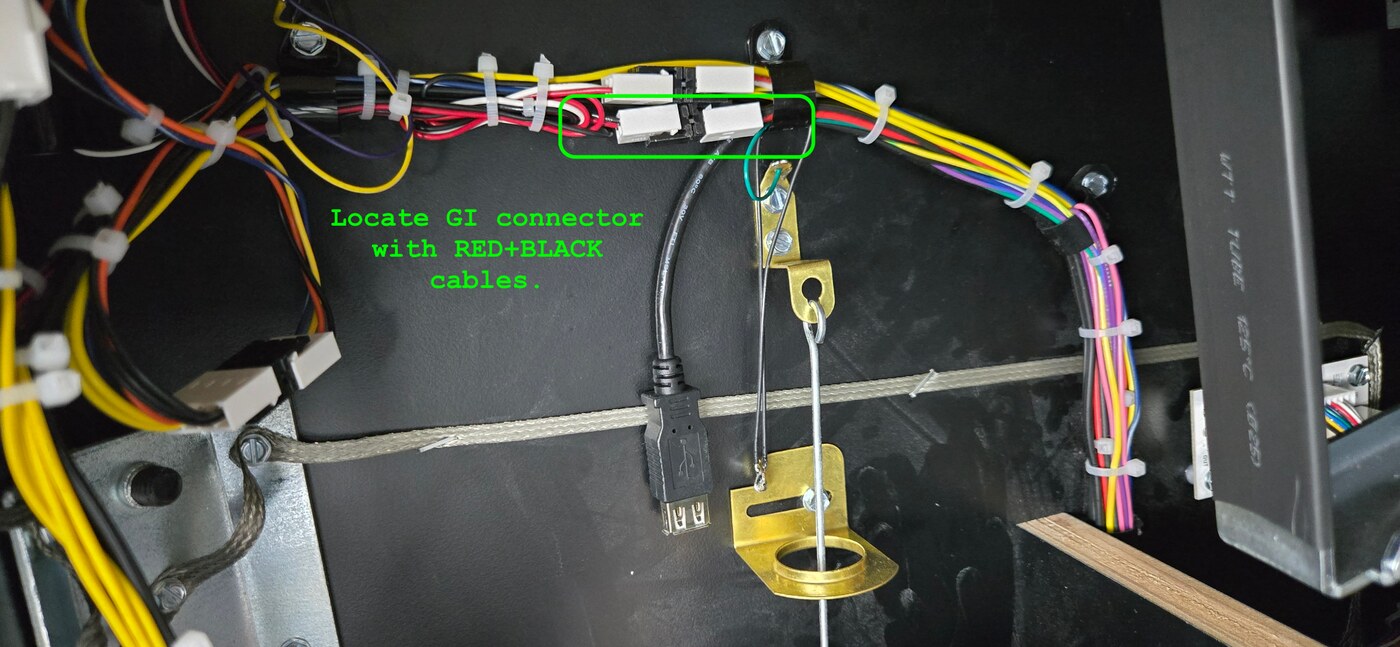
For GI connections, locate the 2-position red/black cable (with white connectors) just inside the coin door on the left cabinet wall (circled below).
Insert the Pinlights GI Cable Inline
Unplug one side of the 2-position connector from the factory cable harness and connect the 2-position connector of the included Pinlights cable in its place. On the Pinlights cable, this is the side without the plastic Z connector.
Reconnect the Factory Harness
Plug the other end of the factory cable harness into the Z-connector on the Pinlights cable.
Run to the Controller Board
Plug the black connector on the Pinlights cable into the included long 2-wire cable, and plug the other end into the Pinlights controller board’s GI port.
Flasher Trigger
Generally in modern games, we suggest triggering the Pinlights flasher when the shaker motor fires.
Locate the Shaker Connector
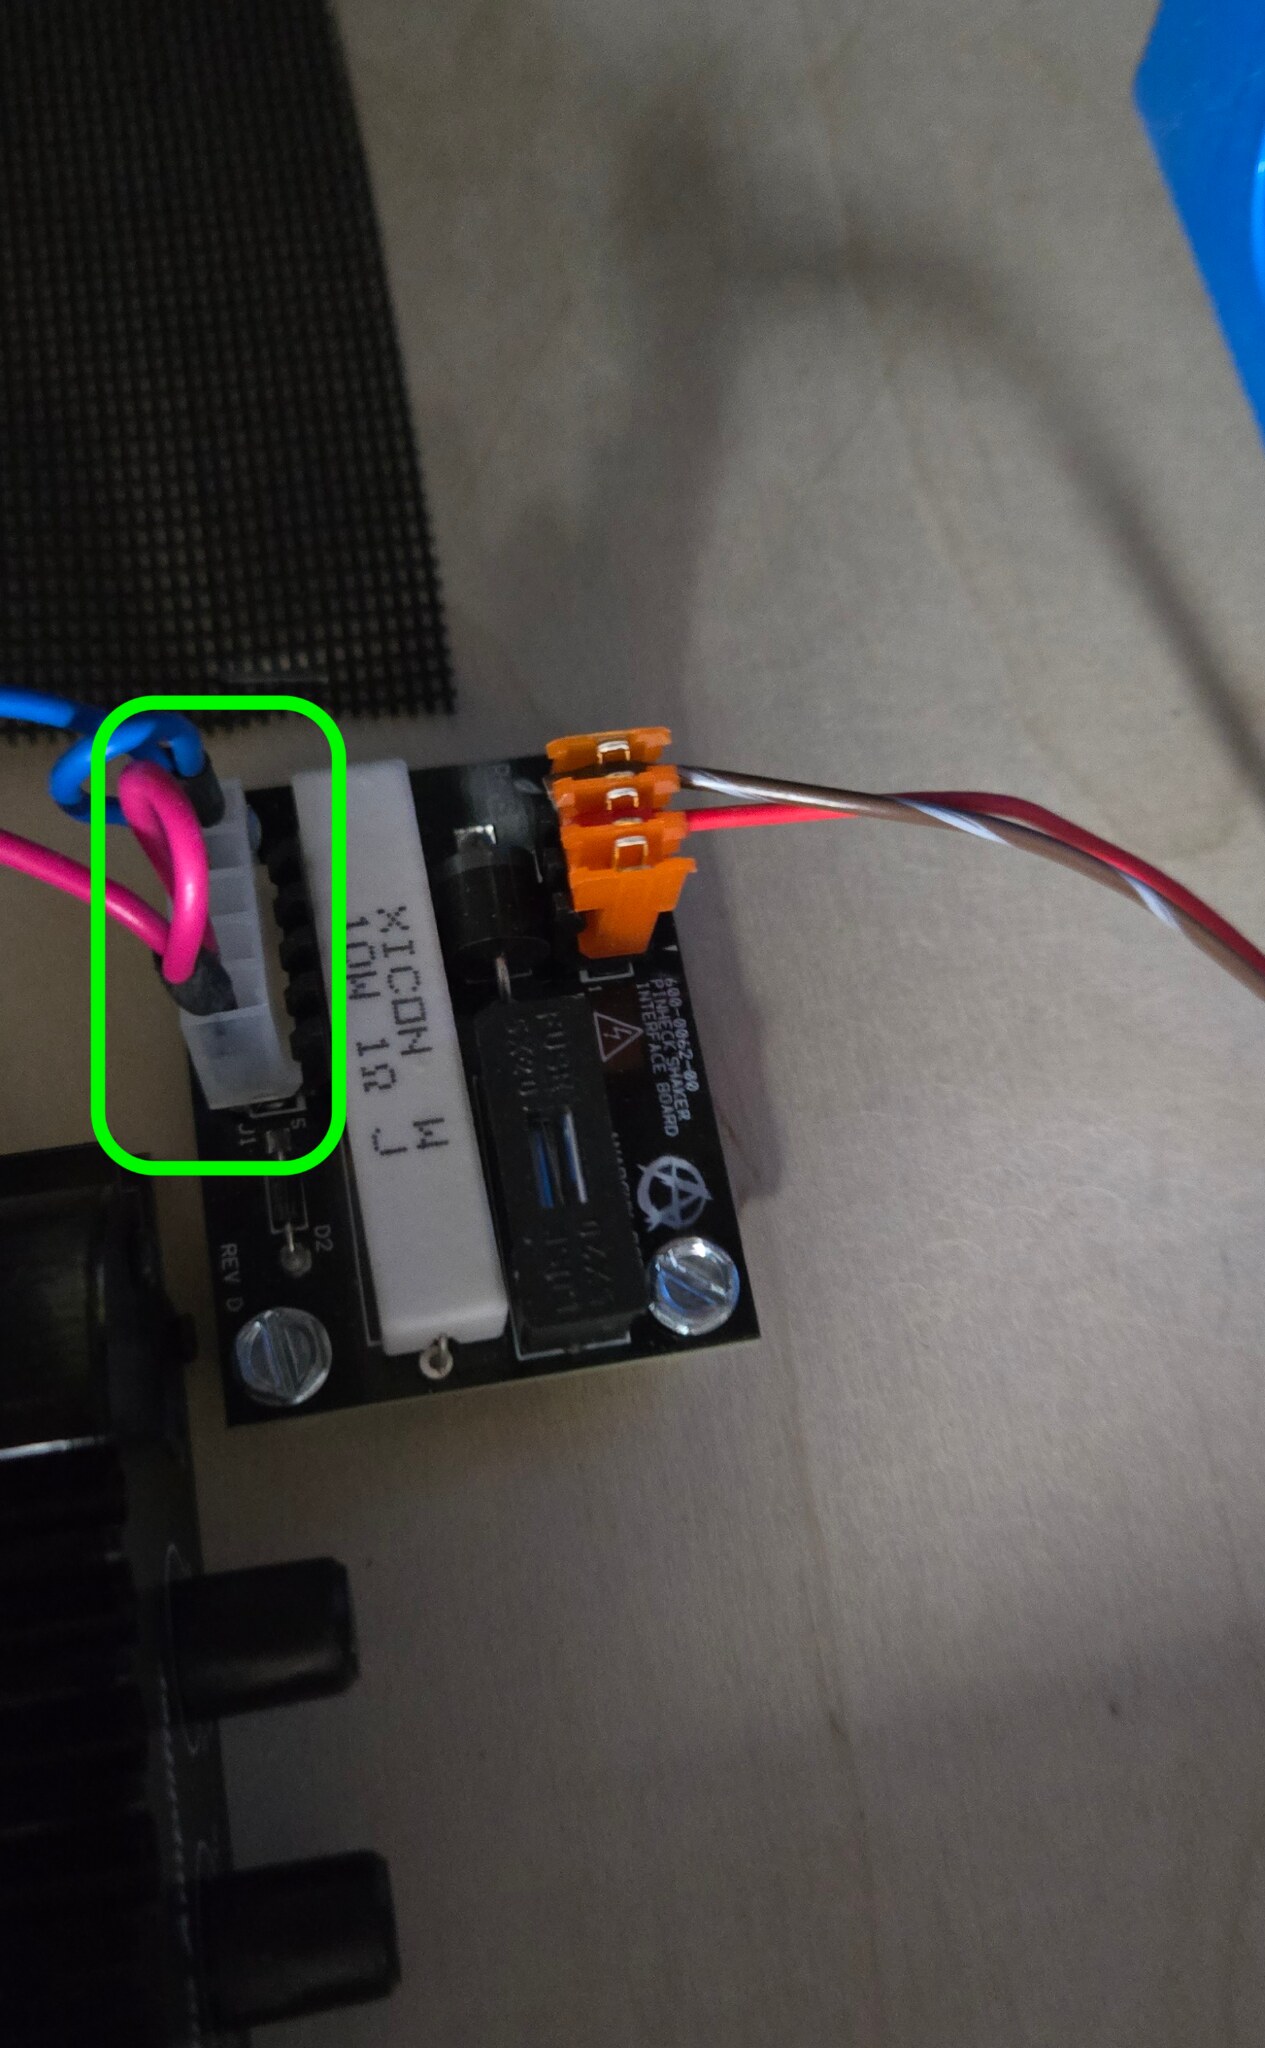
If you have a shaker connection cable (5 pins), locate the shaker connector in the cabinet — often a 5-pin connector with red and blue cables in it (circled below).
Insert the Pinlights Shaker Cable Inline
Unplug the factory connector and plug it into the included Pinlights shaker connector at the Z-connector side. Plug the other end of the Pinlights shaker connector cable into the same 5-pin location you unplugged the factory cable from.
Run to the Controller Board
Plug the black 2-pin connector into the long 2-wire cable included with your kit, and plug the other end into the Pinlights controller’s FL port.
But I don’t have any of those shaker / GI cables
If your kit did not include the shaker/GI cables, or you’re transferring the kit from another machine, you can still use the included wire taps and alligator clips that come with every kit. Insert the metal pin into the back of the connector (ensuring contact with the metal crimp inside), and alligator-clip the exposed metal pin on the other end of the wire. Zip-tie all connections down securely so they don’t move.
For larger connectors, you can also insert the pin into the front of the connector before plugging it into the board, bending the pin around 180° so that the exposed pin creates a “U” shape. The pins are barely small enough that you can plug the cable back in with the metal wire tap also inserted.
For reference, see the methods outlined in the Finding Connections for your Game guide.
To order shaker/GI cables for your Evil Dead, email [email protected].
Questions? Contact [email protected].